On occasion this time, the following article will dwscribe how to make the DHCP server configuration through Winbox on Mikrotik PC Router. Here are step by step to setting up DHCP Server Pc Router.
1. Install MikrotikOs on your Pc router with two ethernet card ( 1 ethernet for internet connection (ether1) and 1 ethernet for Local connection (ether2)
2. Connect your pc router to Windows pc using utp cable, look at the picture below:
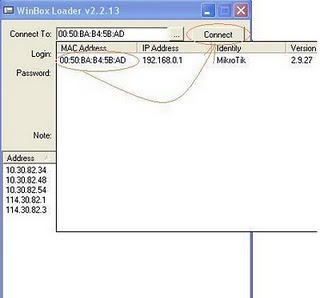
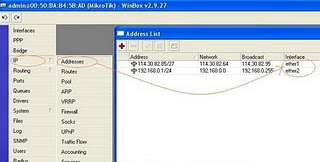
# Set your IP address....click Tab Menu IP------>Address---->Add
Ip for interface ether1 for example: 114.30.82.85/27
Ip for interface ether2 for example: 192.168.0.1/24
look at the picture below:
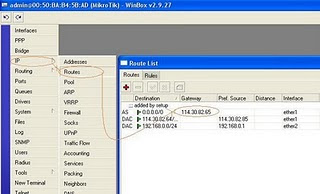
# Set Gateway for your internet connection on interface ether1 (internet connection)
IP--------Routes----Add
For Example Ip Gateway: 114.30.82.65
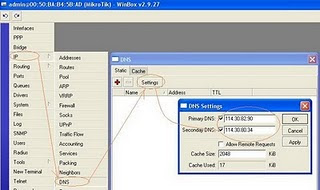
# Set your DNS Server...IP.....>DNS----tab Setting
For example DNS:
primary-dns: 114.30.82.90
secondary-dns: 114.30.80.34
# Setting DHCP Server
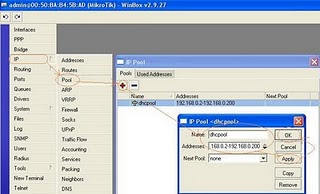
IP----Pool----Pools---->Add
Name: dhcppool
Addresses: 192.168.0.2-192.168.0.100
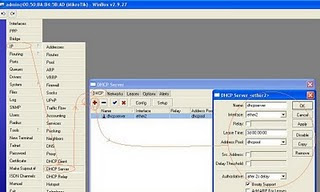
IP------DHCP Server----DHCP----Add
Name: dhcpserver
Interface: ether2
Address pool: dhcppool
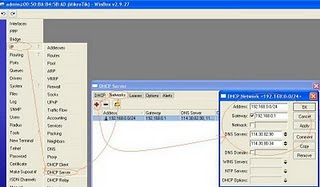
IP----->DHCP Server---DHCP---Networks---Add
Address: 192.168.0.0/24
Gateway: 192.168.0.1
DNS Server: 114.30.82.90
114.30.80.34
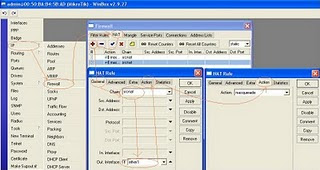
IP----Firewall-----Nat----Add
on tab General:Chain: src-nat
Out Interface: ether1
On tab Action: Action: masquerade
7. Done
Open Tab New Terminal to try your internet connection with Pc router DHCP Server


No comments:
Post a Comment